Voucherify Dashboard
The Dashboard is a central point for any promotional activity run with Voucherify. In this guide, you will learn how to navigate through the main views.
A lock button in the top-right corner of the navigation sidebar lets you toggle between locked and unlocked states. When locked, the sidebar remains fully expanded across all views; when unlocked, it collapses dynamically based on layout or user behavior.
Dashboard
Get an overview of customers' behavior and measure the overall effectiveness of your promotion strategy. Use the collection of real-time metrics and charts to see what works and tailor your marketing strategy for today and tomorrow.

What's New
Read about the newest changes introduced to Voucherify. In addition, there are several useful links leading to our Roadmap, Help Center, Documentation, Slack Community, or API Status.

Project settings
Your Voucherify space is organized around separate projects. Each project has separate API keys and membership settings. In the Project Settings tab, you can configure your Voucherify project. You can also set details about your brand, create an event or metadata schema, check your API usage, manage your areas and stores, and more.

Integrations
Configure the integration of Voucherify with third-party services.

Campaigns
Get an instant overview of active campaigns and their performance. Voucherify allows you to run many types of campaigns.

Go to a campaign to view its performance in the Analytics tab.

Use date-time ranges to display metrics for a given timeframe. Read the Reporting Analytics article to learn more.
The Campaign section also contains information about vouchers, promotion tiers, combined promotions, and categories.
Vouchers
Browse, create, modify, or delete coupon codes. In this subsection of campaigns, you will find exhaustive filters based on coupon features such as code, discount type, status, category, start, expiration date, and more.
With these filters in place, you can easily track down any code, get in-depth insights into its history, and optionally modify it. You can also export the filtered vouchers.

Read the Campaign and Vouchers Maintenance article to learn more about voucher maintenance.
Promotion tiers
Track the performance of each promotion tier separately across all your campaigns. To narrow down the results, you can use filters such as name or category. After selecting a promotion tier, you have access to the Dashboard and Discount tabs, which display all details about the tier, related campaign details, and discount details.

Combined promotions
View all the combined promotions you have created. You can filter the promotions by name and category.

Categories
Define the categories for your promotions – their name and hierarchy. A category is a custom campaign attribute (optional) that you can use to filter vouchers. It is designed to help you filter codes using a custom tag.
You can also filter the categories by name and add a new category by clicking the Create category button. The hierarchy defines in which order the discounts are going to be applied with Stacking Rules.

Important!
The lower the number of the hierarchy, the more important the category. For example, hierarchy 1 will precede hierarchy 2.
You can also use the API to manage categories. Read more in the Category API developer documentation.
Templates
Campaign templates allow you to re-create existing campaigns to quickly set up new campaigns with the same or similar configuration. Campaign templates also support copying campaigns between projects.

Validation Rules
Establish validation rules to model your desired buying and redemption circumstances. You can base your validation rules on a number of features, such as customer segments, order volume, cart content, and more. Validation rules can be filtered by name, type, context, and creation date.
With validation rules in place, you ensure that only designated customers may redeem your incentives, protecting your budget.

Redemptions
Get a complete overview of redemptions and their details. Each redemption record stores in-depth information such as date, status, the reason for failure, and customer data. Additionally, this view allows you to monitor the failed redemptions with a set of convenient filters.

The Redemptions section also contains information about validations, sessions, and stacking rules.
Validations
Get a complete overview of voucher validations and their session keys in the Validations tab.
Validation data is stored for 30 days.

Sessions
Use the Sessions tab to unlock validation sessions. Click the lock icon and press Ok. The sessions can be filtered by the session key attribute.

Stacking rules
The Stacking rules are a collection of conditions that change the behavior of the Validation and Redemption of Voucherify’s promotion tiers and vouchers. These conditions allow you to define how different campaigns affect each other when the customer is redeeming multiple incentives.

Additional reference information about the stacking rules can be found in the Redemptions and Stacking rules articles.
Orders
Get an overview of all the orders made with your coupons. The order tab shows the order ID, customer ID, number of purchased items, amount, precise date, and status. By clicking on the Order ID, you will be directed to a detailed order view.

Products
Import and manage products and product SKUs from your inventory.
This feature makes creating product-specific campaigns very easy. Once the items are synced, you can use them in the up-and-cross-selling promotion tactics. You can also create product collections here.

Product Collections
Create, view, and edit static and dynamic product collections.
Product collections can be used to create discounts that target specific product groups, e.g. only winter apparel.

Rewards
Create rewards for your loyalty and referral campaigns. You can create material rewards or use vouchers, gift card credits, or loyalty points as prizes.

Locations (Enterprise Feature)
Create predefined location objects. Each location object can be a single location defined by specific geo-coordinates (latitude and longitude) or a multi-coordinate area. Locations are needed to create area-specific segments and introduce geofencing to your campaigns.

Campaign Calendar
The calendar shows active and draft campaigns in a daily, weekly, or monthly view. You can click the campaign bar to display campaign summary and go to campaign details.

Demo Shop
This mockup shop lets you test campaign results before the launch.

Customers
View details about your customers.

Voucherify enables you to sync customer profiles with your CRM, enabling you to build promotional campaigns that target only specific, fine-grained segments. Customer segments can consist of customers filtered by dozens of parameters, including address, order history, or custom properties (metadata).
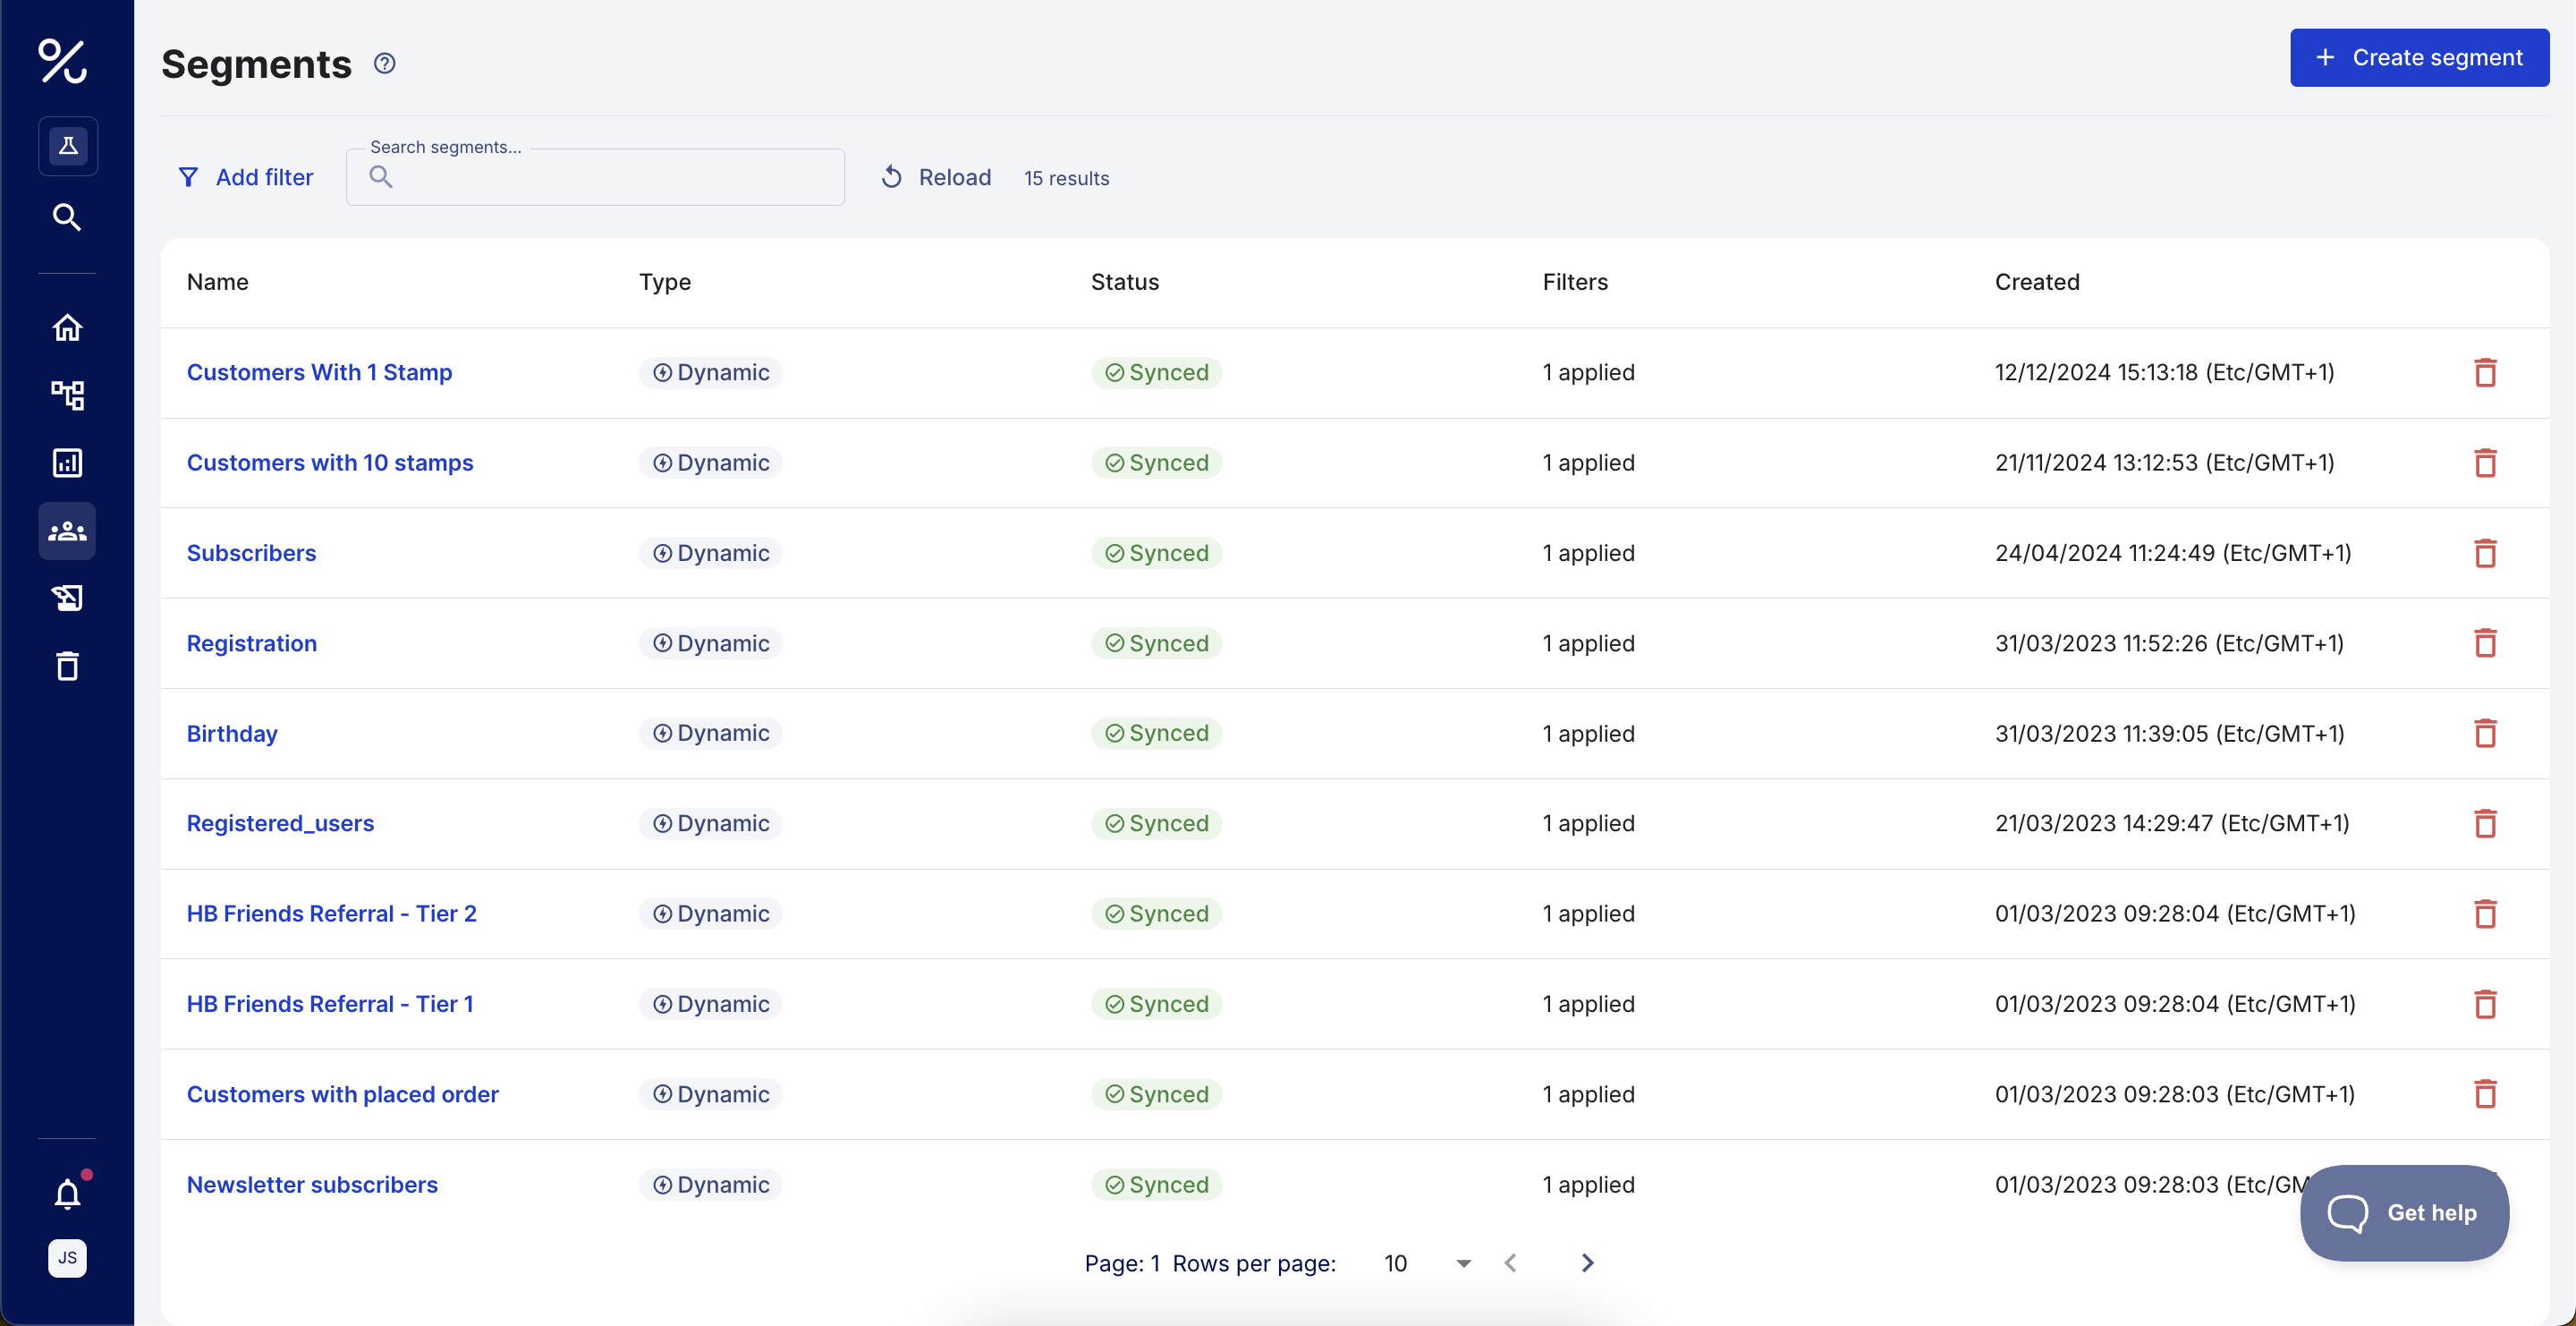
Segments
View detailed information about segments. Click a segment to view customers, export them, see the filtered attributes, and more.
Distributions
Define when and how your promo codes should be distributed to customers. Use multiple distribution channels, such as email and SMS, to automate the rollout of engaging, right-on-time promotions.

Audit Log
View the complete logs of your project. You can check interactions with Voucherify API sorted by request origin, status, and date. Logs and their filters give you instant access to account users' and customers' activity, which is crucial for troubleshooting and advanced performance monitoring.
You can also check the statuses and details of background tasks, exports, and webhook sendouts.

Bin
Delete permanently resources that have been moved to the bin. When a resource is in the bin, you cannot create a new one with, e.g., the same source ID or code name. Thanks to the bin feature, you can permanently delete the resources moved there.

Team settings
Click your username in the bottom left corner to access Team settings. There, you can configure your subscription, view invoices, manage your team, projects, and roles, delete people's data, and set security and legal and compliance details.

You can invite team members to access your dashboard and help you manage promo campaigns. Each team member can have different privileges that restrict the information they can see or actions they can take in a project. There are four predefined user roles: ADMIN, USER, VIEWER, and MERCHANT. However, you can create your custom roles (enterprise feature) by selecting appropriate privileges.
My profile
View general information about the user, the email addresses of the account owner and Voucherify data protection officer.
Security tab allows you to set up two-factor authentication, change your current password, and see the recent security activity.
Legal tab provides a copy of Voucherify standard terms and privacy policies, as well as amendments for your compliance needs.
Email subscriptions tab allows you to select the types of communication you would like to receive from Voucherify.

Approval Requests (Enterprise Feature)
Implement approval request policies for custom user roles to protect your promo campaigns from internal fraud or errors.

Support
View all currently open support tickets. You can also use it to contact support directly and create new tickets.
