Account Security
In this article, you'll learn about the tools and features that ensure your account security.
Contents
- How does it work?
- Multi-Factor Authentication (MFA)
- Password Change
- Account Activity Logs
- Notifications
- SAML Authentication
How does it work?
Account security can be managed in two places within the Voucherify Dashboard.
-
To manage your security settings, go to My Profile, and choose the Security tab.

-
As an administrator, you can also manage security in the Team Settings drop down option and enforce security settings for all account users in the Security tab.


Multi-Factor Authentication
The Account Owner can enforce Two-factor Authentication for logging into the Voucherify account. As a result, each logging attempt requires two forms of authentication. Voucherify supports text messages, Google Authenticator, and back-up codes as a second identification mechanism. Go here to learn more.

Password Change
To change your Voucherify password, go to My Profile and choose the Security tab. Click Change password.

Provide the current and new passwords. When ready, confirm with Change password.

You are going to receive an email notification each time a password change is performed.
Account Activity Logs
To gain valuable insights into account activity, you may also monitor the account security logs. They are found under My Profile > Security tab.

Project logs
For more information about activity within a particular project, visit the Audit Log section in your Dashboard. The Audit Log presents detailed information on every interaction with the Voucherify API made within your project. It enables you to track requests coming from all origins including account users and customer's requests. Each log provides the request the was sent, the API response, and details including its status including information about related objects (campaign, order, and more). Read more.
Notifications
Two types of notifications are displayed for the user.
- Project specific notifications - the settings for these are customizable (more details below)
- Account specific notifications - related to your subscription updates like trial expiration, credit card, etc.
Notifications are displayed in the Dashboard in two locations.
- Unread notifications - In the upper right section of the Dashboard, Click the bell icon
- Read and unread notifications - Click the bell icon, then click Go to Notification Center
Keep on reading below for more details on the Notification Center.
Unread notifications
To access the unread notifications, click the bell icon.

You can Mark all as read, Reload to refresh the notifications, and Load more to display more unread notifications.
Here, the notifications are divided between three tabs:
-
The Notifications tab lists notifications about your project.

To display all your notifications, click Go to Notification Center. You may need to scroll down to see this option displayed.
-
The Account Notifications tab lists notifications related to account activity such as the start of a paid subscription or problems with processing a payment with a payment card.

To display all account notifications, click on Go to Notification Center. You may need to scroll down to see this option displayed.
-
The Background Tasks tab lists all processes that are currently running in the background, such as importing vouchers to a campaign or deleting a campaign to name a few.

To display all background tasks, click on Go to whole list. To display the details for a given task, click Details. Read more here about background tasks.


Personalize notifications
You can personalize the notifications in two ways depending on the type of notifications you would like to customize. Click on the notification bell, choose either the Notifications or Account Notifications tab, click on Go to Notification Center. Then choose either the Personal Settings or Account Settings tab.

Project specific notifications
You can customize project-specific notifications and decide what events should trigger notification via email or in-app message. Project-specific notifications are customizable and visible per user. Every user can configure which notifications to display for the current project.
In the Notification Center, click the Personal Settings tab to personalize your project notifications.

Next to each notification type, there is a drop down arrow Show details. Here you can turn the in-app and email notifications on/off using the toggle switch.

API Usage notifications
To enable new notifications, navigate to the Notifications Center > Account Settings and follow the steps below:

- Click Show details next to the notifications you'd like to activate.
- Define the % usage limit that triggers the notification.
- Click Add email to define a receiver email address.
- Confirm with Save.
SAML Authentication
SAML (Security Assertion Markup Language) ensures easy and centralized access management to your business applications and resources. Voucherify enables account administrators to connect a custom SAML application and use it instead of the standard authentication process while logging in. As a result, your users can log into the Voucherify account using a single sign-on authentication process.
Add users to Voucherify
Please note that to allow a user to log in to Voucherify via SAML, that user needs to exist in Voucherify. Therefore, you need to manually add a user to Voucherify using the same email address the user has in the app. To learn how to add team members in Voucherify, read more here.
How to login using SAML
You should login by clicking on the application within your Identity Provider dashboard.
As a fallback, you can try navigating to your dedicated cluster, i.e. https://CLUSTER.app.voucherify.io/#/login/saml, or to https://app.voucherify.io/#/login/saml and entering your email address.
Please note that if you have SAML enforced, you will not be able to login using your username and password.
How to turn on SAML
The account administrator can enable and enforce SAML Authentication in the Team Settings > Security tab.

Enforce
Turn on on Enforce only after first enabling SAML and verifying that it works properly.
Prerequisites
To connect the custom SAML application with Voucherify, you will need:
- Identity Provider EntryEndpoint URL (1) – in this field, provide the SAML URL where the identity provider sends the authentication token.
- Identity Provider certificate (2) – electronic document copied from the identity provider settings and used to prove the ownership of a public key.
Optional configuration details:
- Provider Name (3) – the name of your identity provider, e.g., OneLogin, Auth0.
- Issuer (4) – stands for the EntityID (unique identifier) of the service provider.
- Audience (5) – a value within the SAML assertion that specifies who (and who only) the assertion is intended for. The audience represents the service provider, usually by using a URL address that is validated when the request is received.

Encrypt SAML requests
To increase the security of your transactions, you can sign or encrypt both requests and responses in the SAML protocol:
- Sign SAML-Requests – add the private tenant key to sign SAML requests. You can also provide your own private/public key pair to sign requests from a specific connection.
- Decrypt SAML-Response – by default, the identity provider uses the private/public key pair assigned to your tenant to sign SAML responses or assertions. In the case of very specific scenarios, you might wish to provide your own key pair.

Azure Configuration
This tutorial explains how to connect to Azure Identity Provider.
- Open the Microsoft Entra admin center and go to the Applications > Enterprise applications menu.
- Click New Application.
- Select Microsoft Entra SAML Toolkit. Name and create your toolkit.
- Choose the Single sign-on option in the Manage menu.
- Click the SAML tile.
- Edit the Basic SAML Configuration section:
- Set the Identifier (Entity ID) to your chosen value: the filled-in value or your own URL.
- Add the reply URL and provide a placeholder URL there. It will be changed later.
- Provide a placeholder URL for the sign-on URL. It will also be changed later.
- Save the configuration.
- Copy the Login URL from the Set up [your application name] section
- Go to the Security tab in your Voucherify account team settings and enable the SAML authentication.
- Enter the copied URL in the Identity Provider Entry Point URL field.
- Download the Base64 Certificate from the SAML Certificates section in your MS Entra SAML toolkit page.
- Paste it to the window that appears after you click the Add Certificate button in the Voucherify SAML configuration form.
- In the Issuer field, type in the Identifier (Entity ID) value from step 5.
-
Enable the SAML authentication and save the configuration.

- Copy the Callback URL from Voucherify.
- Return to the MS Entra SAML Toolkit page to edit the Basic SAML Configuration.
- Paste the URL into the Reply and Sign-on URL for your SAML configuration. Save the changes.
- In the Microsoft Entra SAML Toolkit page, go to Manage and the Users and Groups submenu.
- Select the users or groups you want to grant permission to your Voucherify account and click Assign.
- Note: perform this step before inviting users to your Voucherify account.
- Invite the users to the Voucherify account:
- Copy each user's email address from the MS Entra SAML toolkit console.
- In the Voucherify console, open the project you want to invite the users to.
- In Team Settings, go to the Team tab and click Invite member.
- In the pop-up window, enter the user’s name, role, and email address and assign projects they should have access to. When ready, click the Invite Member button.
- The invited users should receive an email from Voucherify with a verification link. After they open it and set up a Voucherify password as a fallback, if an identity provider fails to work, they will be able to access the Voucherify account.
- The users should open the link present in the Callback URL field in the Security tab of Team Settings. It will redirect them to the Azure login screen.

Auth0 Configuration
This tutorial shows the required steps to connect to the Auth0 Identity Provider.
Refer to the Auth0 documentation for more details here.
After logging into your Auth0 account, go through the following steps:
- Go to Applications in the sidebar and click Create Application.
- Enter the name, select the type of application (Regular Web Application), and click Create.

-
Make sure you are within the application you want to configure and scroll to the bottom of the Settings page and click Advanced Settings.

- Choose the Endpoints tab and scroll down to the SAML section, and copy the SAML Protocol URL.
- Log into your Voucherify account and go to Team Settings > Security tab. Enable the SAML Authentication and paste the copied URL in the Identity Provider EntryPoint URL field.
- Go back go to Auth0 and switch to the Certificates tab. Copy the Signing Certificate.

- Go to Voucherify and click the Add certificate button.
-

Paste the copied identity provider certificate and confirm with Save.
-

Click Save to confirm SAML configuration.
-

In response, you should see the Callback URL. Copy the link and go back to Auth0.

- Go to the Settings in Auth0 and scroll down to the Application Login URIs section. Paste the copied callback URL in the Allowed Callback URLs field. Click Save Changes to confirm.
-

Scroll up the page and go to the Addons tab, then click on the SAML2 Web App.

In the Settings tab, after reviewing the details, scroll down and click Enable. Next, confirm your changes with Save.


You can also enforce SAML authentication within your Voucherify account. As a result, each user has to log in using a connected identity provider.

Enforce
Turn on on Enforce only after first enabling SAML and verifying that it works properly.


You can now use the SAML Authentication to log into the Voucherify app using Auth0 as an identity provider. To log in, use the callback URL from Voucherify Team Settings > Security tab.

OneLogin Configuration
This tutorial shows the required steps to connect OneLogin Identity Provider.
After logging into your OneLogin account, go through the following steps:
-
Go to the Applications tab and choose Add app button in the top right corner.

-
Use the search bar to browse SAML Custom Connector (Advanced) and click on its name to add the app.

- You can define optional connector's details like name, icon, and description. Click Save and go to the Configuration tab.
- Change SAML encryption method to AES-128-CBC and confirm with Save.
- Go to the SSO tab. Copy the SAML 2.0 Endpoint (HTTP).
-
Log into your Voucherify account, go to the Team Settings > Security tab and enable the SAML Authentication. Paste the copied URL in the Identity Provider EntryPoint URL field.

You can also enforce SAML authentication within your Voucherify account. As a result, each user has to log in using a connected identity provider.

Enforce
Turn on on Enforce only after first enabling SAML and verifying that it works properly.
- Go back to OneLogin and click View Details below the Certificate.
- Copy the X.509 Certificate.
- Go back to Voucherify and click the Add Certificate button. Paste the copied certificate and confirm with Save.
- Confirm SAML configuration with Save. In response, Voucherify shows you a Callback URL. Copy the URL and go back to the Configuration tab in OneLogin.
- Paste copied URL to ACS (Consumer) URL field. Confirm with Save.


You can now use the SAML Authentication to log into the Voucherify app using OneLogin as an identity provider. To log in, use the callback URL from Voucherify Team Settings > Security tab.
Okta
This tutorial shows the required steps to connect to the Okta Identity Provider.
Refer to the Okta documentation for more details here.
After logging into your Okta account, go through the following steps:
-
Go to Applications in the sidebar and click Create App Integration.

-
Choose the SAML 2.0 sign-in method. Click Next.

-
In the General Settings step, input the application's name and, optionally, Voucherify’s logo. Click Next.

- In the Configure SAML step, provide the following data to configure the integration.
- Single sign on URL: You need to provide a dummy value to the Single Sign-On URL field at this point. This is because OKTA generates the Provider SSO URL after defining the application. The sign-on URL will be created in Voucherify based on the OKTA certificate and the Identity Provider Single Sign-On URL. We'll come back to substitute the dummy value at the end of the configuration (more on this in the steps below).
- Audience URI (SP Entity ID): MUST be the same as the Audience in Voucherify. We define the Audience in Voucherify in this step.
- Name ID format: MUST be set to EmailAddress.
-
Application username: MUST be set to Email.

- Click Next. Provide feedback and click Finish to save the App Integration. You should be immediately redirected to the Settings tab for the application.
-
In the Settings tab, scroll down to the SAML Signing Certificates section, and click on View SAML setup instructions (located to the right).

-
Copy the Identity Provider Single Sign-On URL.

-
Log into your Voucherify account and go to Team Settings > Security tab. Enable the SAML Authentication and place the copied URL in the Identity Provider EntryPoint URL field.
You can also enforce SAML authentication within your Voucherify account. As a result, each user has to log in using a connected identity provider.
Enforce
Turn on on Enforce only after first enabling SAML and verifying that it works properly.
-
Go back to Okta and copy the X.509 Certificate.

- Go to Voucherify and click the Add certificate button.
-
Paste the copied identity provider certificate and confirm with Save.
-
In the Audience field, enter the same audience name as you have entered in the Audience URI (SP Entity ID) field while configuring the integration in Okta.

-
Click Save to confirm SAML configuration.
-
In response, Voucherify shows you a Callback URL. Copy the URL and go back to the General tab in Okta.
-
Scroll down to the SAML Settings section and click Edit.

-
Click Next and paste the copied Callback URL from Voucherify into the Single sign on URL field in Okta. Click Next and Finish.

- Assign users to your newly created application by adding them in the Assignments tab in Okta.


You can now use the SAML Authentication to log into the Voucherify app using Okta as an identity provider. To log in, use the callback URL from Voucherify Team Settings > Security tab.
PingIdentity (PingID)
This tutorial shows the required steps to connect to PingID. Refer to the PingID documentation for more details.
After logging into your PingID account, go through the following steps:
-
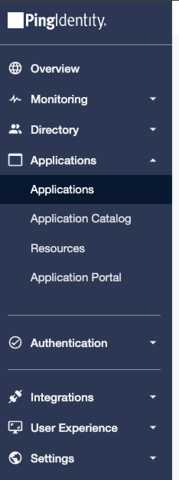
In PingID, navigate to Applications > Applications and click Add New Application.
- Enter an application name, for example VoucherifySSO1.
- Set the Application Type to SAML Application.
- Under SAML Configuration, select Manually Enter.
- For ACS URLs, enter a placeholder such as https://placeholder.
-
For Entity ID, enter a value like Voucherify_integration_1.

- Download the Signing Certificate in X.509 PEM (.crt) format.
- Copy the Initiate Single Sign-On URL to the clipboard.
- In Voucherify, go to Team Settings > Security > SAML Authentication, and enable it.
- Paste the copied Initiate Single Sign-On URL into the Identity Provider EntryPoint URL field.
- Enter Voucherify_integration_1 as the Audience.
- Click Add certificate in the Identity Provider certificate section.
- Paste the content of the .crt certificate file.
- Click "Save" for the certificate, then click "Save" again for the SAML configuration.
-
A Callback URL will be generated; copy it by clicking on it.

- Return to PingID, open the VoucherifySSO1 application, and click Configuration > Edit.
- Replace the placeholder ACS URL with the Callback URL and click Save.
- Go to Attribute Mappings and click Edit.
- For saml_subject, change the mapping from Application ID to User ID or Username.
- Add a second mapping:


- Name: http://schemas.xmlsoap.org/ws/2005/05/identity/claims/emailaddress
- Value: Email Address
-
It is recommended to mark this field as Required


- Enable the VoucherifySSO1 application in PingID.
- Create a new user in PingID (Directory > Users); they must have an email address associated with them.
- Create the same user in Voucherify with the same email address. The Voucherify user must confirm their email and set a password as a fallback if SSO is disabled.
- Users should now be able to log in with SSO via PingID. To test this, open the CallbackURL in incognito mode, log in as a user from PingID -> you should be redirected to the Voucherify page as a logged-in user.