Creating a Landing Page
Note
Keep in mind that in order to use the Landing Pages Creator and allow interaction between your clients, landing page, and Voucherify, you first need to add Origin from which requests are accepted.
In order to do so, go to the Project Settings and in General Tab, scroll down to Client-Side Settings and set "Your website URL". For test purposes, you can also put "*" to allow client requests from any origin. When ready, confirm with SAVE.

Then scroll down and in the Danger Zone section, you can choose what limits you'd like to establish when it comes to your customers interacting with your landing page.

For instance, for Loyalty Program Landing Pages, you should check the following boxes:
"Enable Client-Side Publication"
"Enable Client-Side customer creation"
But for the code redemption landing page, you should additionally check the following:
"Enable client-side redemption"
"Enable client-side voucher expiration date update"
In this dashboard section, you can create customized landing pages and publish them with a single click.
Each landing page is a short website automatically connected to your Voucherify account. Example templates available in the landing pages manager have built-in subscribe and redemption forms which you can use to collect new customers and manage coupon redemptions.

Subscribe form
When a customer fills the form on your landing page, all the data is saved in the Voucherify dashboard. It means you can acquire new clients (including participants of loyalty and referral programs), manage publications of your promo codes, and also allow for client-side redemptions. Thanks to the automatic sync of each landing page, Voucherify can publish codes from previously chosen campaigns, and validate each redemption attempt coming from created websites.

Redemption form
To create your first landing page, open a respective dashboard section, and click on the Plus.

Next, select the type of a template and the purpose of your landing page. Keep in mind that these templates may be freely adjusted to your needs and can be used just as a source of inspiration

In this tutorial, we are going to work on the "Collect Subscribers" template. Bear in mind that you can freely customize the page in the next step so choosing the type is non-binding and serves only as a suggestion.
At the 3rd stage of the Landing Pages Creator, you will get a chance to customize your template.
On the left, you will see your template and on the right, you will find customization options. Here you'll also find the Preview (for both mobile and desktop), Save, and Release options.

Let's see what Voucherify has to offer in terms of customization:
- 1
-
First, provide some basic information about your landing pages, such as the name, optional description, customer ID (phone or mail) which will identify your customers in Voucherify, icon, logo, colour, and fonts. You can also enable or disable the double-opt-in feature.
-

- 2
-
You can also design success and failure pages, apart from the active campaign view, which gives you full control of your customers' journey. Each template offers a different set of pages that you can freely customize.
-

- 3
-
Last but not least, you can also design the specific elements of your page, such as Logo Bar, Message, and Footer. We also added something extra for you and you may add elements of your choice - perhaps you'd like to include rewards for subscribers in your landing page design? You can do it with just a click.
-

- You can also share social media links via your landing page.
-
This feature allows you to customize the text visible on the landing page, select which social media links to add, and last but not least to customize the tweet's text and hashtags.
-

-
Adding official rules to the landing page:
-
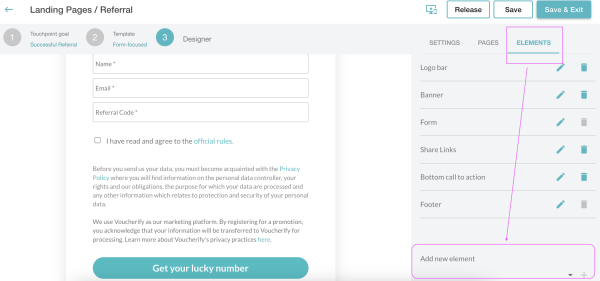
1. Go to the landing page edition mode and on the right-sided menu change to the Active campaign page, then switch to the Elements tab:
-
-
2. On the very bottom, you will see an Add new element option. When you expand the list, you will find a Promotion rules element. Please select it and then use the Plus button o add it to the Elements list.
-
3. Once the Promotion rules option is added above, you can use the Pen button to edit this element.
-
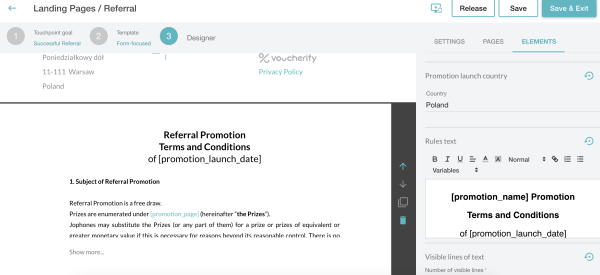
4. In the edition mode of Promotion rules, there is a dedicated space where you can enter terms and conditions:
-
-
5. When the page is saved and published, a customer who clicks on the Official rules button will get defined conditions displayed:
-

-

-
Updating the link to the landing page:
-
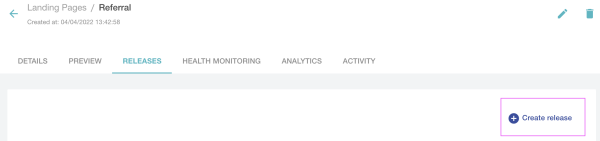
The link is defined when you publish a page, so if you want to change it, you should unpublish the page with the incorrect address and then use the Create release button to release the page with a new address:
-
-
Now all that's left is saving your landing page and publishing it.
-
From a default template:
-

-
To fully customized masterpieces, such as this :
-


