Autopilot
This integration allows you to add a new contact from Autopilot to Voucherify automatically. Plus, you can enhance the profile of a contact being stored with custom properties stored in Autopilot.
Prerequisites:
- Zapier account
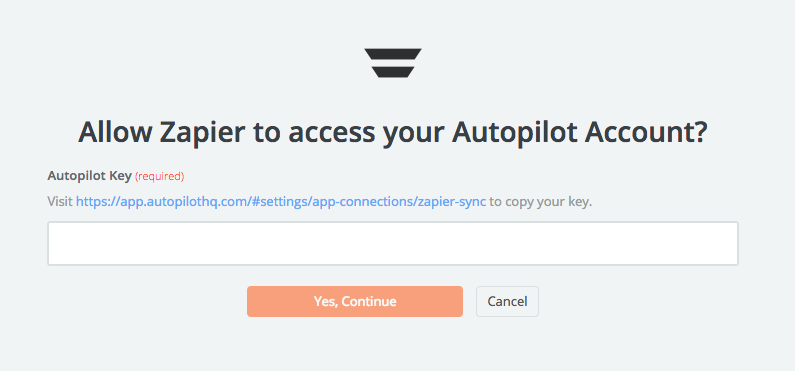
- Autopilot account (generated API key for Zapier)
- Voucherify account (keys from project settings)
- BETA version of Voucherify <> Zapier app - invitation link
Zapier configuration
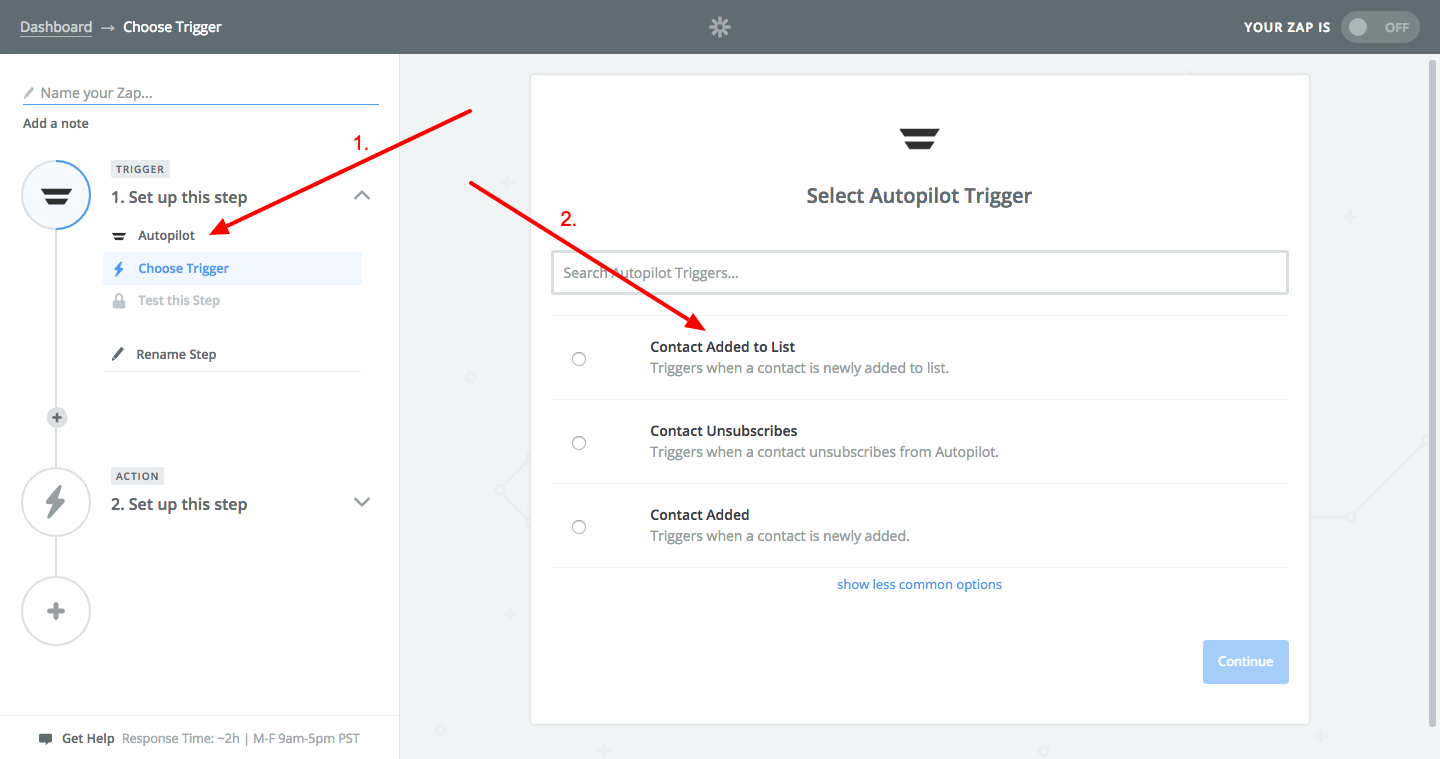

- Source Id - Autopilot contact ID or email.
- Email - customer email, Customer Name.
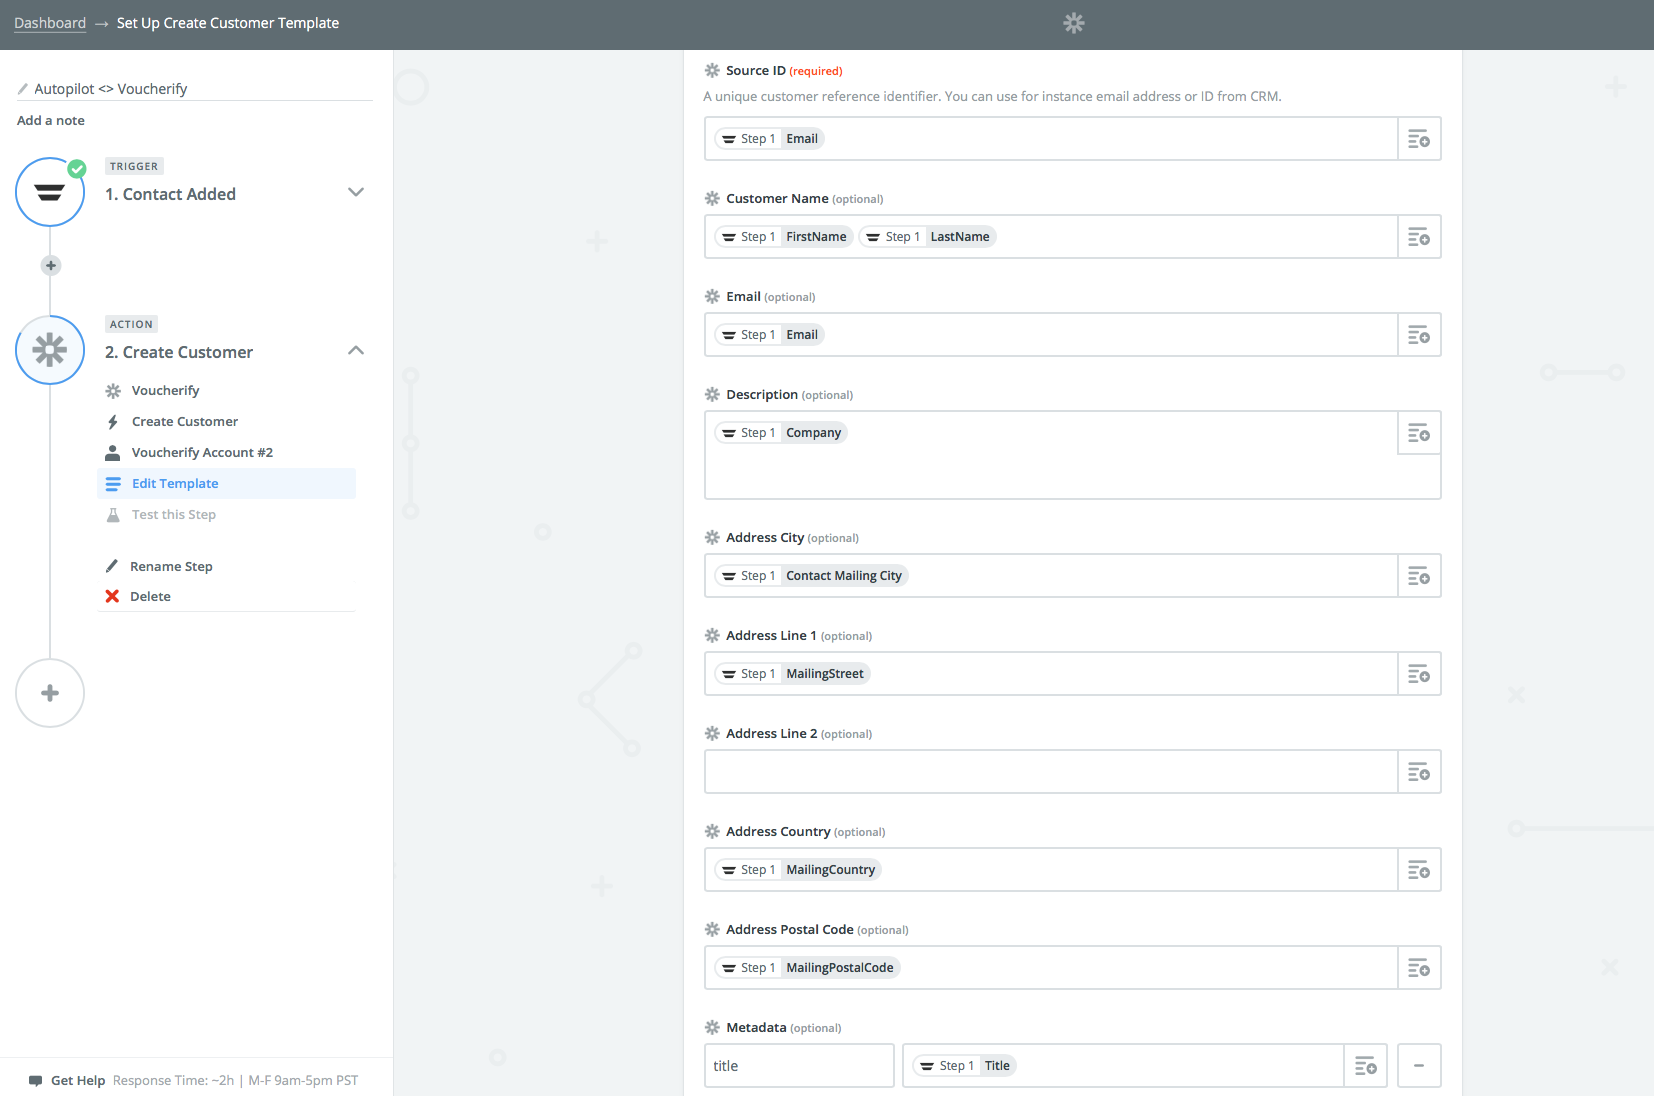
Metadata - custom properties which will be useful for defining distributions and corresponding customer segments: title, company etc. You can use your custom names for properties.
Finalize Your Zap. Back on your new Zap screen.
Test: Try out your Zap using the sample/test data shown next to your fields. When you have finished this step, click Continue. As a result of the test, you will see a new customer in Voucherify.
Name Your Zap: Give your Zap a name. You may find it easiest to use the same Title/Name given to the corresponding feed.
Make it Live: Click the Make Zap Live button. That's it!