Salesforce
You can sync Salesforce data with Voucherify to manage your audience, build customer segments, and launch personalized promotions.
The plugin described below has the ability to map certain SF objects and fields into corresponding Voucherify entities. The sync can be scheduled according to your pre-defined plan.
To reduce the payload size, Voucherify syncs only the fields which have changed their state (diffs).
In this section:
Installation 💿
- Visit this installation link.
- Acknowledge that you’re fine with the manual installation and confirm with Install.
- Grant the plugin access to call Voucherify API (api.voucherify.io.)
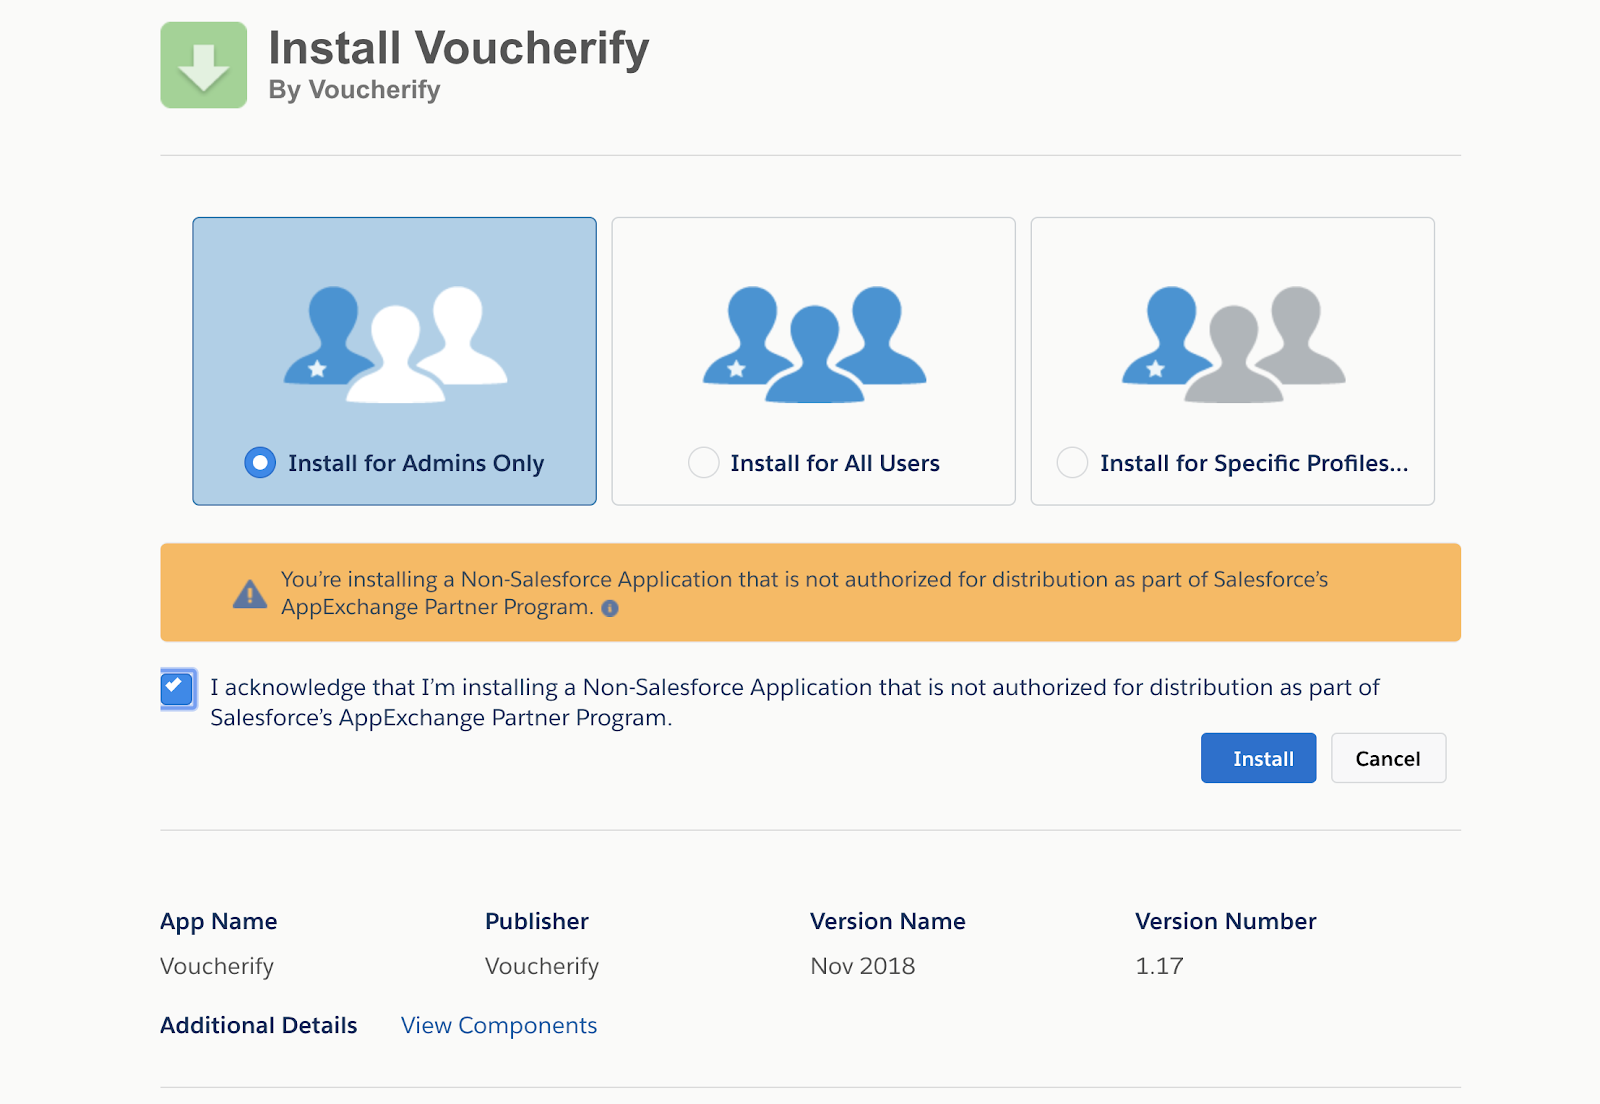

4. Install Voucherify ✅

5. After successful installation, go to Setup → Custom Settings and press Manage for Voucherify Settings.
On the next view, click New to configure organisation level settings

6. Provide the information from your Voucherify account > Project settings (mandatory fields: Application ID and Secret Key).
We strongly recommend providing Error Email Address - it will be used to send any errors related to Voucherify <> Salesforce plugin (see Error Handling and Debugging section below).

Note
The above configuration is done for a project hosted in the EU cluster, if your project is hosted in US or Asia cluster, place the API endpoint related to your region:
1. Go to Setup → Custom Settings.
2. Select API Endpoint option and put in the correct value of your cluster which you will find in the Project Settings in Voucherify.
| Europe (default) | https://api.voucherify.io/v1/ |
| United States | https://us1.api.voucherify.io/v1/ |
| Asia (Singapore) | https://as1.api.voucherify.io/v1/ |

3. Make sure that the cluster is enabled in the Remote Site Settings.
Upgrade
Go to plugin settings and follow the installer’s steps as in the example below.


User Guide
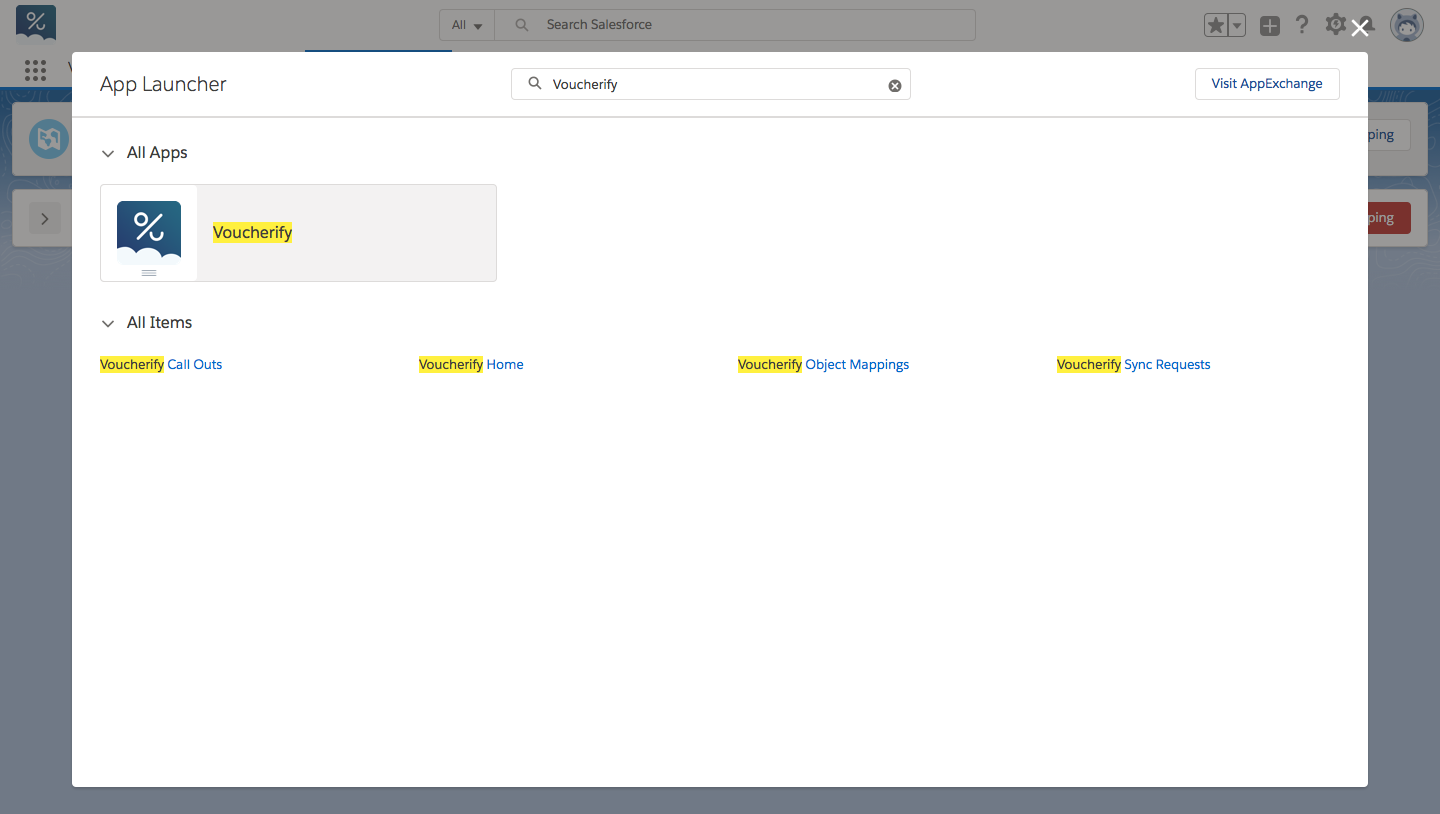
- Go to App Launcher and type 'Voucherify' in the search box.
- Select Mappings Summary tab. If you can see an empty board it means that the plugin doesn’t synchronise any data at this point.
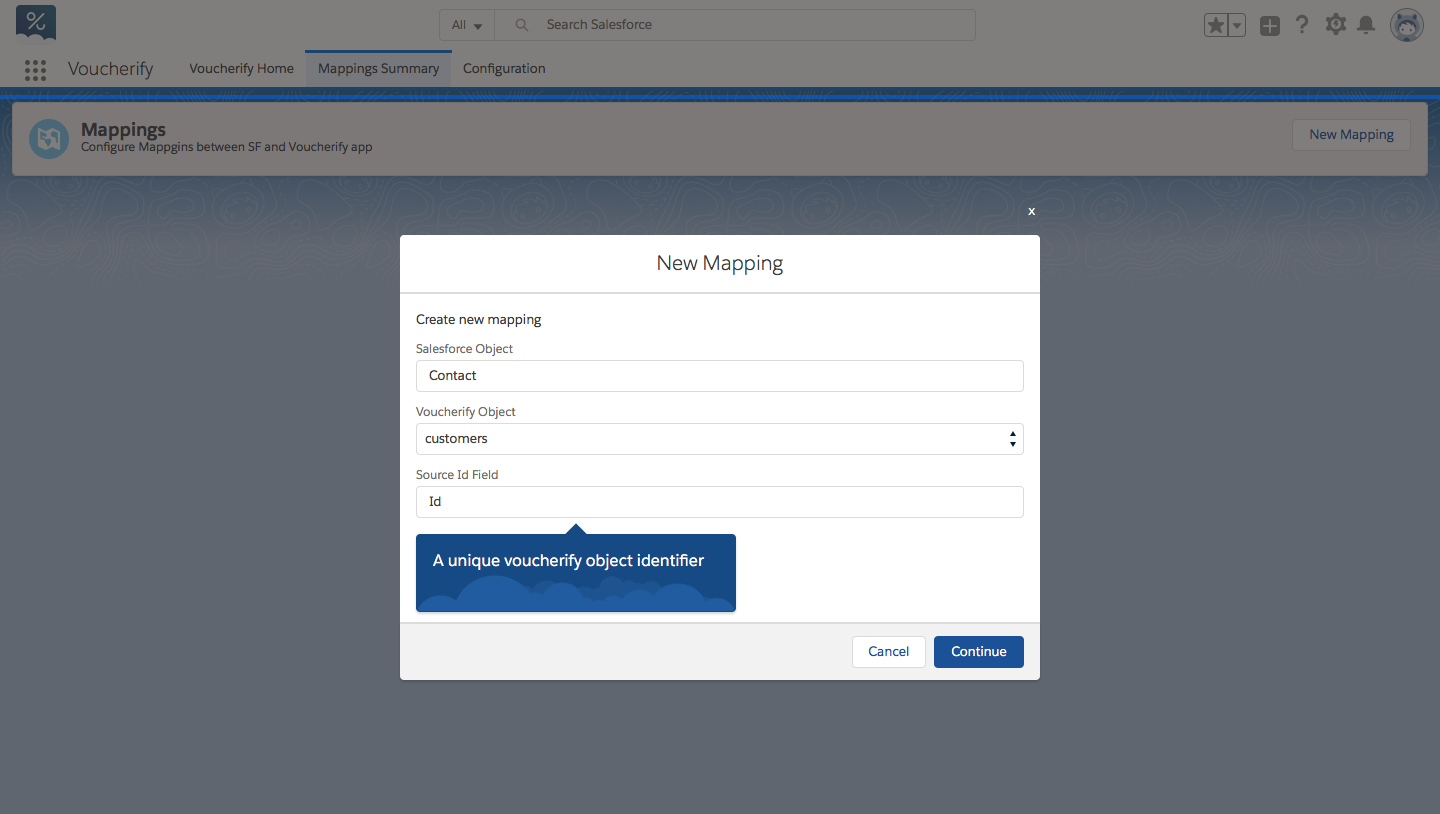
- Create a New Mapping.
- As an example, we’ll configure the plugin in a way that it syncs Salesforce Contact entity into Voucherify Customer object:
- Use the first auto-complete input to select Contact entity.
- Select customers from the second input.
- Choose which SF fields from the Contact entity will serve as a unique identifier in Customer object (read more about source_id in the API reference). Usually, you might want to choose Id or Email fields.
- In the next step, you can define which fields should be synced to Voucherify. For security or Salesforce limits reasons, you might want to keep the number of fields small enough to achieve your promotion goals.
- Add the next field with +.
- Provide the following data: Mapping Type - Field (regular object’s field), Constant (what you type in the Salesforce Field input ends up as a string in the Voucherify Field), Tag (an array of strings with tags ends up in the Voucherify Field).
- Save (you can always disable the field sync later on with the ACTIVE flag).

- You can add other mappings, apart from Customer, Voucherify supports Redemption object.


Sync Schedule
The Configuration board enables you to initiate your connection between Salesforce and Voucherify. It also provides the current and historical sync status.
To make the data flow, schedule a sync job. The plugin allows you to define a custom sync interval: 
To sync objects, the plugin creates some temporary objects in Salesforce, you might want to keep them for some time for debugging purposes. But remember to purge them by scheduling a cleaning job: 
You can force any sync as shown in the picture: 
Error handling and debugging
Email alert threshold - when callouts start failing for some reason, you want to be notified. With this feature, you can define the condition when the plugin should send an email alert. When the number of failed requests reaches the given percentage of total callouts scheduled, a notification is sent.
Stop sync threshold - when the number of failed requests exceeds the provided percentage, the plugin will stop the sync job and send an email notification
Requests Overview
If we want to get a full overview of requests made to Voucherify, you can go to Setup → Custom Settings → Manage.
Now untick Clean Successful Immediately and go to Voucherify Call Outs to see the requests list.
By default, you will see the failed call outs (+reason) only.
In Voucherify Sync Requests tab, you’ll find information about the last syncing job, including:
- total call outs
- failed call outs,
- job id in Salesforce,
- json field Debug Mapping.
You can go to Voucherify Sync Request object directly from Voucherify Call Out.
💡 Note
In the case of two consecutive empty Voucherify Sync Request (total call outs - 0), the first one is removed from the list.